Assembling the armour parts
This tutorial shows you how to on assemble your armour, please take your take time, be careful if using ABS glue, use a thin even layer and put a cold damp cloth on the other side to avoid any warping of the plastic.
Parts required
- Armour parts already trimmed
- Clamps or large elastic bands to hold parts together
- Glue ABS or E6000 and Super glue Gel, The glue type depends on what plastic your armour is made from? E6000 will glue anything to anything (requires 10 hours to cure fully but will last a lifetime. ABS glue like Pipe weld will only weld ABS and PVC (be careful as it creates a chemical reaction welding the plastic together. For styrene and HIPS, I recommend E6000, do a search on ebay for this.
- Small machine screws and nuts or small rivets
- Strong Scissors and Industrial Velcro (heavy duty)
- Stanley Knife/ Exacto knife
- Heavy Duty Velcro
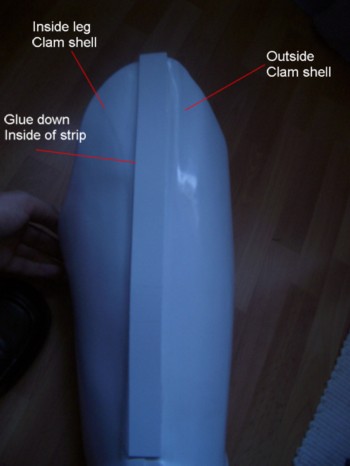
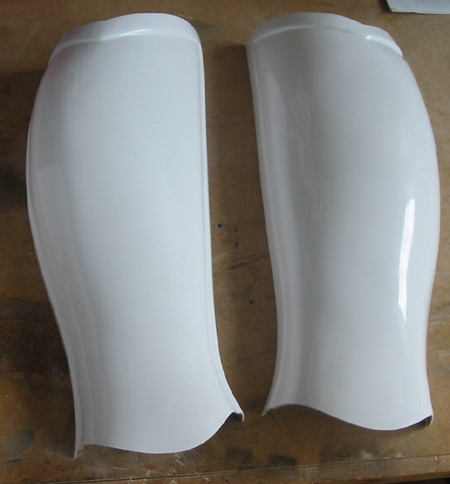
Step 1 Thighs
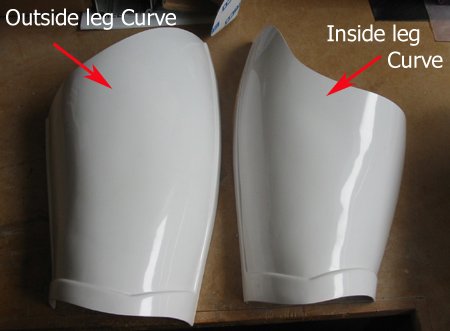
- The thigh armour consists of two clam shell halves (see photo above). The Inner thigh( part goes in towards the groin) half and the outer thigh part (part goes towards hips).
- Take an outer and inner thigh part, get some masking tape and put the halves together to test fit.
- You may have to shave some plastic from the top of the thighs if your legs are too short. This will be covered in a tutorial soon.
Gluing the thigh clam halves
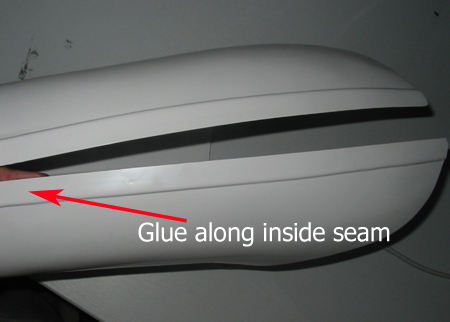
- Using either ABS glue or E6000 run a strip of glue along the raised profile as seen in photo above.
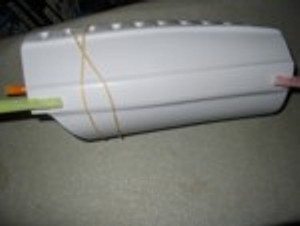
- Using Clamps or elastic bands clamp the inner and outer parts together, leave to bond overnight.
- *Tip - If you have problems with the 2 halves staying together run a small line of Super glue gel on the outer edge, this will create a short term bond whilst the other glue cures.
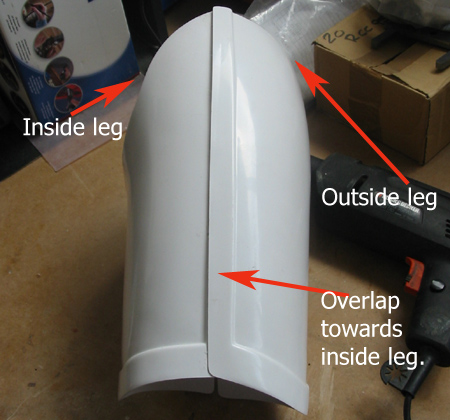
- The above photo is of the two thigh parts glued together, to make things neat, I normally make the plastic overlap towards the inner leg part.
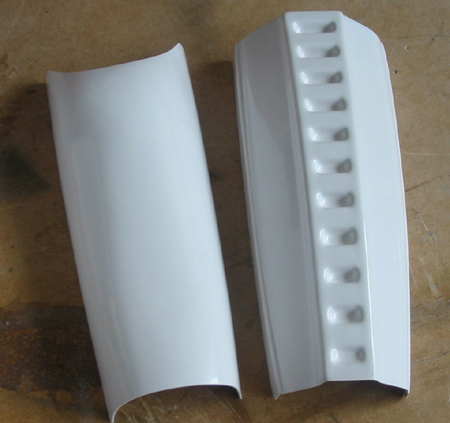
- If you are assembling an AP, TE or GIno set of armour you will have to place and glue the long strip of ABS on top . See above photo.
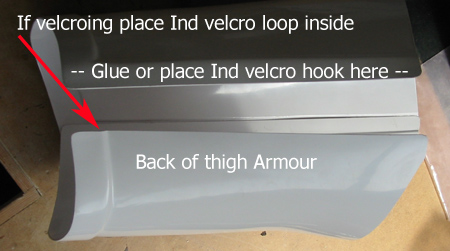
- The back of the thighs if you are slim enough, you can glue this together, so you step into the thighs
- Another way is to velcro the back of thighs, place strip of heavy duty velcro hook on the outside edge of one half.
- Then place a strip of Heavy duty velcro loop on the inside edge of the other half. See photos above and below for reference.

Step 2 Forearms
- If you arms are small enough, you can glue the forearm clam shells halves together. Otherwise glue one side and use Industrial velcro on the other, so it opens up enabling you to put your forearm in. If it still doesn't fit? you will need to place a shim, See Shims section under Tutorials for details. The above method will work for the biceps too.
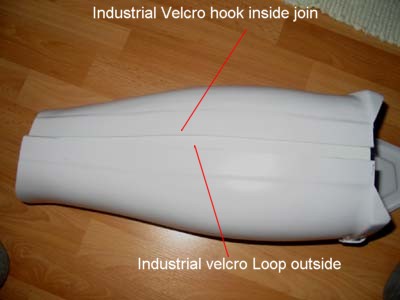
Step 3 Calves
- Put the two clam shells halves together and ABS glue the front.
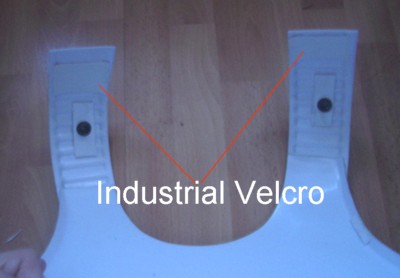
- At the back opening, cut a strip of Industrial velcro hook and super glue into the inside seam.
- Cut a strip of Industrial velcro loop and super on the outside of other clam half, see photo.
- Now wrap the halves over each other, this is the only way you get your calves in to the calf pieces. If your calves are too big to fit and there is still a gap? You will need to place a shim, See Shims section under Tutorials for details.
Step 4 Lower thigh power pack belt
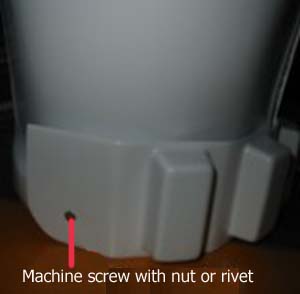
- Take your completed RIGHT thigh section
- Tape or velcro the belt in place or mark the drill holes.
- Drill a hole into the bottom sides of the thigh and both sides of the power cell belt (same size as the screw or rivet you are using).
- Here I have used small machine screws with nuts, but you can use rivets if you like.
- Paint the screws or rivets white.
- *NOTE the Power pack belt goes the right thigh.
Step 4 Sniper Knee plate
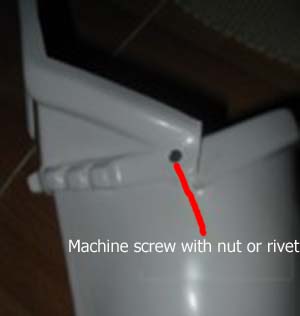
- Take your completed LEFT calf armour
- Tape or velcro the belt in place or mark the drill holes.
- Drill a hole into the bottom sides of the thigh and both sides of the power cell belt (same size as the screw or rivet you are using).
- Here I have used small machine screws with nuts, but you can use rivets if you like.
- Paint the screws or rivets white.
- NOTE the sniper plate goes on top of the LEFT calf.
Step 5 Front and back Armour
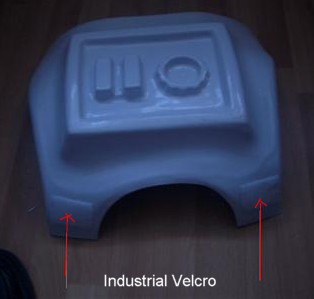
- The connecting bridges can be fixed in many ways, ABS glue them on, rivet them on, use machine screws with nuts or in this case super glue Industrial velcro.
- Sand the area where you want to velcro to go the ends of the bridges, the top of the chest and top of the back,
- Apply Super glue Gel on the squares of Heavy Duty velcro and stick to the appropriate areas
- Industrial (Heavy duty) Velcro allows you to adjust the front and back armour to fit you perfectly, it is hidden, no screws or rivets visible and it great for storing away the armor therefore making it easy to transport to events.
- I have used Ind (Heavy Duty)velcro on 4 suits and all have held well, trick is to make sure you glue the velcro down well.
- There is no reason why you can't mix methods like ABS glue the front and use Ind velcro on the back.
- Below is a photo of where I stuck the Velcro squares for the connection bridges to connect to
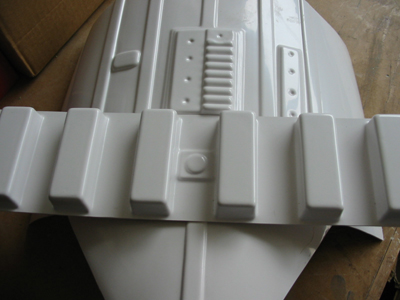
Step 6 Cutting the AB section in two
- This is a great modification if you want to be able to move around in the armour, pick things up, sit down etc. This mod is a must!
- The above suit was a friends FX suit I was working on, but this should apply to all makes. There should be a natural line for you to follow when cutting the ab section in two. It's just below the raised moldings, see photo above. The trick is to cut where the join will be hidden by the Ammo Belt.
- Using electrical tape create a guide for you to cut, this will help guide you ad well as protecting the surrounding plastic.
- Using your craft knife start to score lightly within the recess. This will create a guide for your knife to follow, once you has repeated this you should be able to apply more pressure.
- After you have scored the line a few times or are halfway through the plastic if you feel brave enough :0) You can snap the section in two.
- Turn the Ab section over (see photo) Take the bottom of the code and place your palm on the upper section. Pull the code section towards you. Keep on bending the plastic until it breaks in two. You should be left with two clean cut sections.
- The trick to this modification is to cut where the join will be hidden by the Ammo Belt.
- Now we need to join the cut cod section to the upper Ab section, so it can pivot.
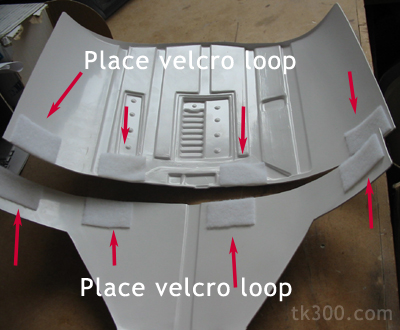
- Cut 8 squares of Heavy duty Velcro and place in the positions shown in the photo above (marked by the arrows).
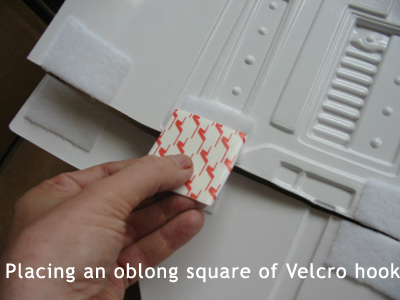
- Cut 4 oblong pieces of Heavy Duty Velcro Hook (rough edge) the size should be the length of the 2 loop squares together you created earlier.
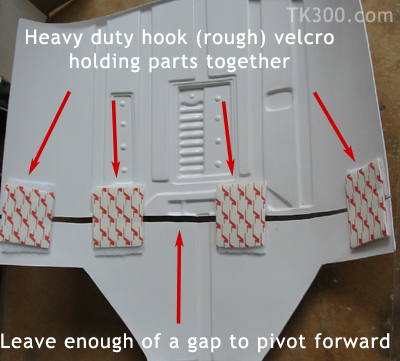
- Place each oblong piece of velcro hook on the velcro loop as shown in photo above. Leave enough of a gap to create a hinge, so that the two sections can pivot backwards and forwards.
- That it's you are done, fit the belt on top to hide the join.