ANH Armour Reference
Below are screen caps of various Stormtroopers from A
New Hope, I have added them as a reference on how the original suits were trimmed
and put together, this may be helpful to those of you are trimming movie
accurate suits. This Section is still work in progress.
Helmet Detailing

- Looking at Luke's Hero helmet above you can the following:
- Blue Tube Stripes - these are the line of half crescent blue marks that run across the top of the tubes (see red arrow). So far we know the costuming department at Elstree used at least two different blues as the helmets owned by TE had different shades of Blue. One colour is the darker Humbrol Midnight Blue(15) the other is the more lighter blue Humbrol Mediterranean Blue(48) . You may hear some people saying that French (14) was used. Seeing as TE owned 2 helmets I showed him what the colour Humbrol French blue looked like a few years ago, he said the helmets he owned didn't have that shade. Still who knows maybe others did??
- Grey Frown, tears and Trapezoids - again seeing as Humbrol supplied the Studios like Elstree. Humbrol Dark Ad Gey(5) was painted on all these parts, the fine black detailing like the edges and stripes were pained using Gloss black. Gloss black was also painted on the black Vocoder (mouth)
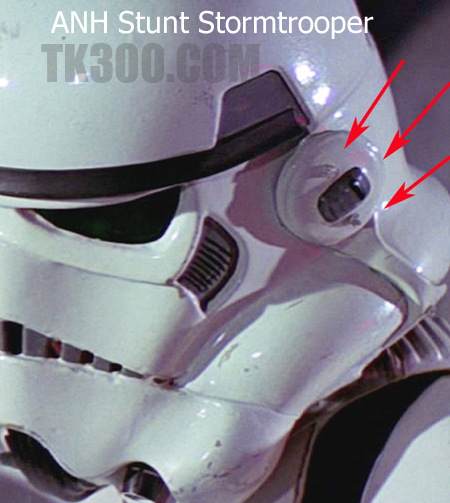
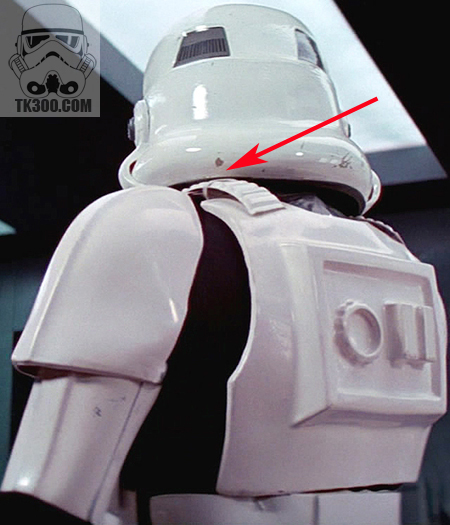
Helmet Ear markings and screw location
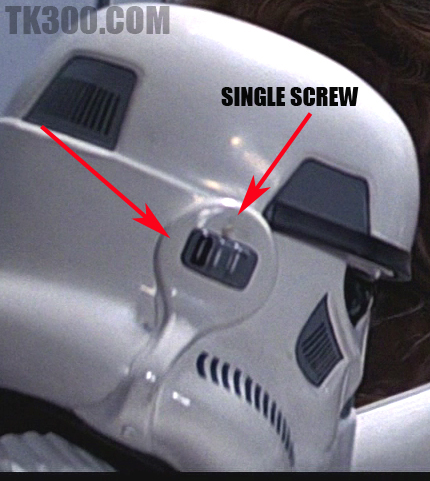
- Most of the Stormtroopers in ANH have a single black stripe on the antenna.
- Also notice on the above photo of Luke, the Hero helmet only has a single screw above the antenna., unlike 2 screws above and below on the Stunt trooper shown below. Also notice this trooper doesn't have any tube stripes.
- For in depth look a the Stormtrooper helmet take a look at Jez's amazing site Starwarshelmets.com
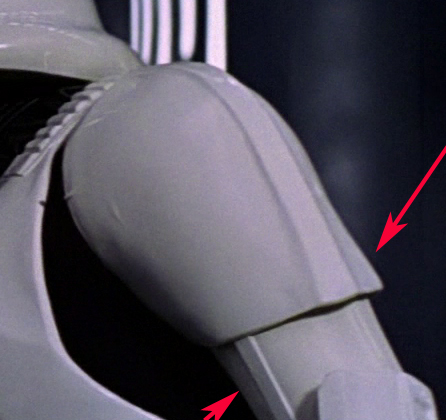
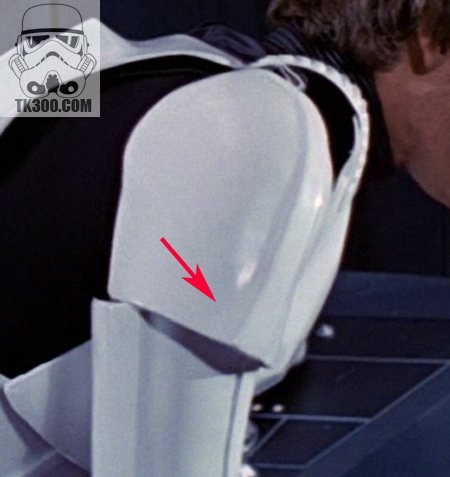
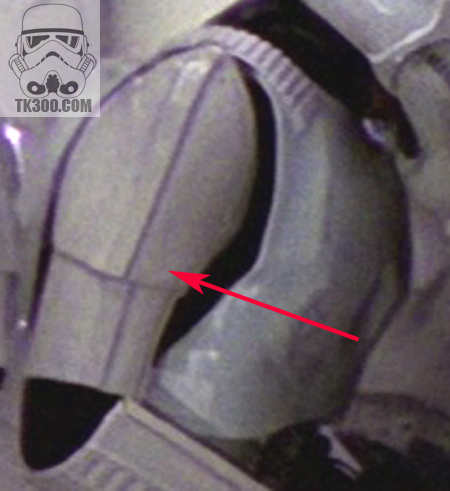
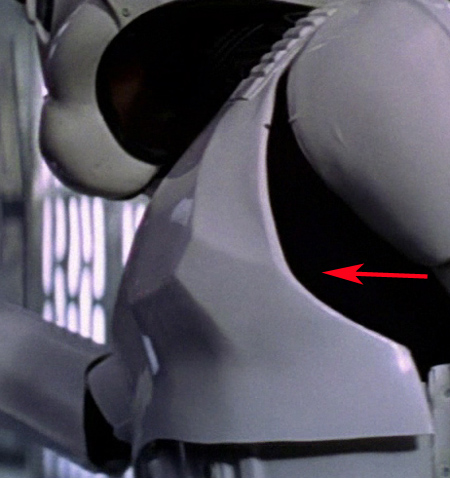
Shoulder Bell
- Above - Luke's Left Shoulder Bell - notice the raised ridge ends in a flare tapering forward, his right shoulder was straight. Notice the ABS plastic strip covering the clam shell join on the bicep.
- Above Han's Right Shoulder bell with flare tapering backwards, his left shoulder didn't have the flare. The shoulders must of been put on backwards, hence why Luke has his on the left and Han has the flare on the right side.
- Above a Stunt Trooper Right shoulder bell, notice how this side the raised ridge profile is the same width all the way down, no flare..
Biceps
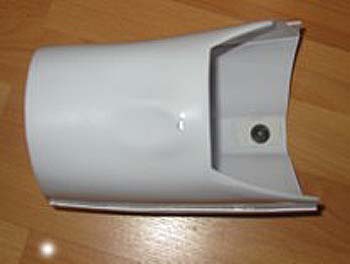
- Above is a photo of my bicep armour with the correct trimming.
- The biceps were trimmed in many different ways, Peter Diamond's were trimmed with a deep cut out, as he was the trooper lying down firing at Luke and Leia in the Death Star.
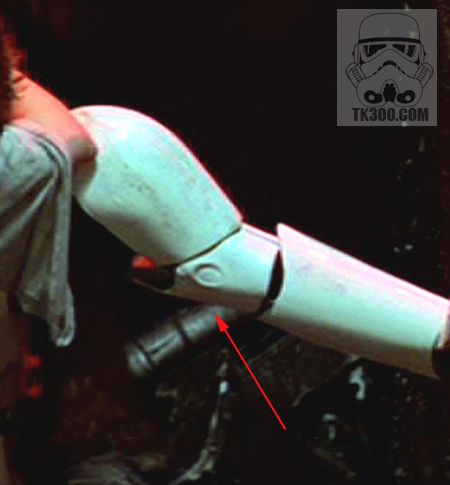
- The photo above is of Luke's bicep, you will notice an oval shape, this is a thumb print left in the mould. You can also see this mark on ESB and ROTJ armour.
Hand plates / Gloves
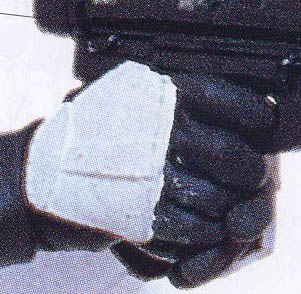
- The hand plates were formed from white rubber (latex) and glued into the black glove. There were 2 types of hand plates for the TK, one type is seen above. You can see a different hand plate in the photo below.
- The type of gloves worn were black rubber chemical gloves.
Chest
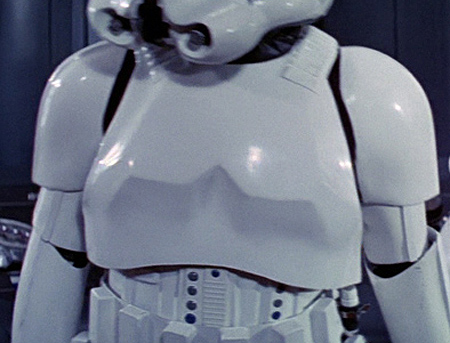
- Above - Luke's Chest armour was cut higher and differently due to mark Hamil's height. This enabled all the Ab buttons to be visible.
- Above -Stunt Trooper chest , different shape to Luke's, notice the flashing left to make the armour look thicker - also notice the different colour buttons on the AB plate.
- The photo above shows how the chest plate was connected to the AB section. Also notice there is a gap at the sides showing the black undersuit. So if you do have a gap, it's movie accurate ;-).
- White elastic straps were used to stop the chest falling into the AB section.
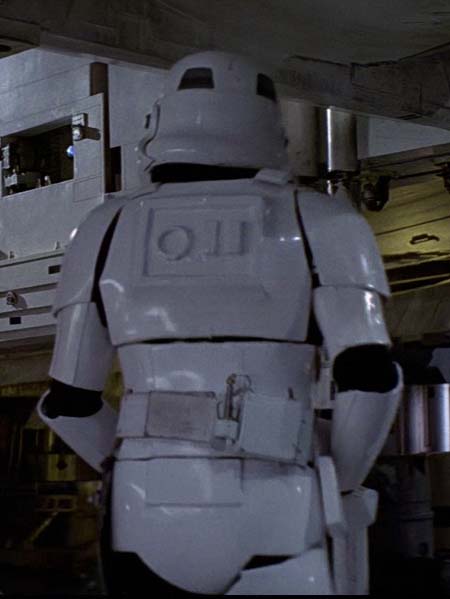
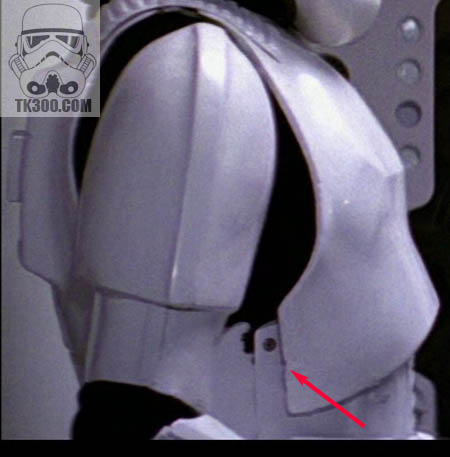
Back
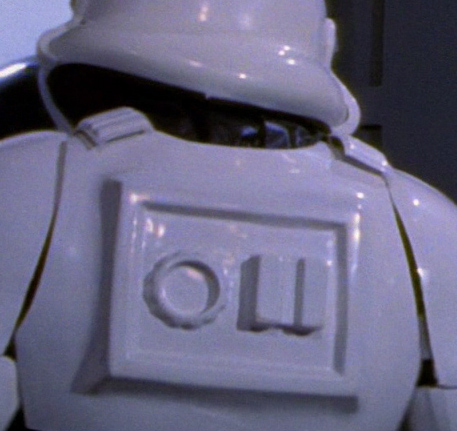
- Above is a photo of Han's back armour, with the OII shape.
- On all the troopers the connection bridges were left floating at the back, held down by white string or elastic.
- At the front the connection bridges were glued. These were purely cosmetic, the front and back were held together with white elastic material straps glued to the plastic.
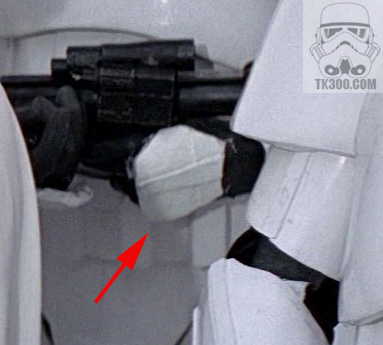
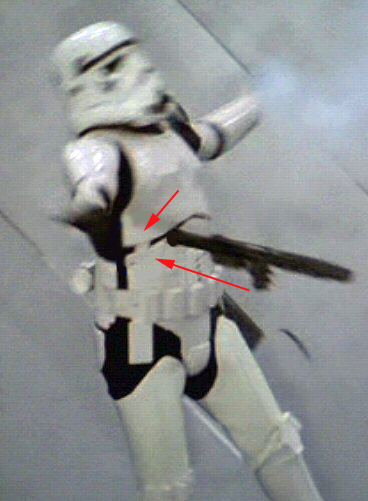
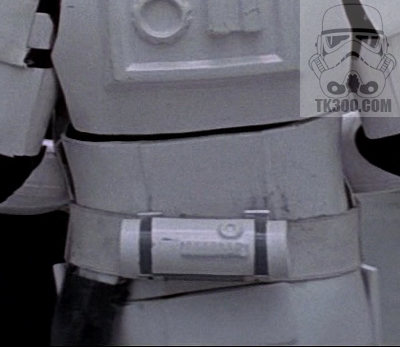
Ammo Belt trimming. shape
- Notice the above photo of Han leaning over, you can see the belt has the edges trimmed diagonally.
- Above it Luke's belt from a promo shot, it is attached by rivets instead of machine screws. Also that's not a canvas belt. Looks like vinyl or leather (check the light brown fraying edges, canvas wouldn't be like that).
Side rivets and belt machine screws
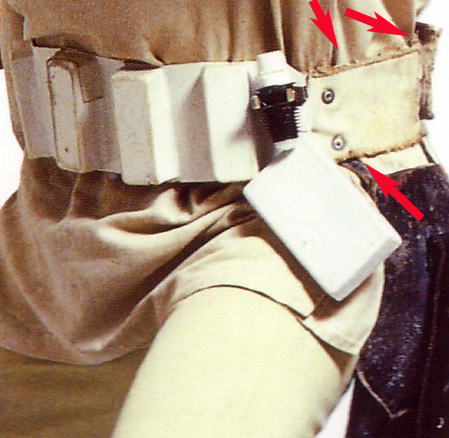
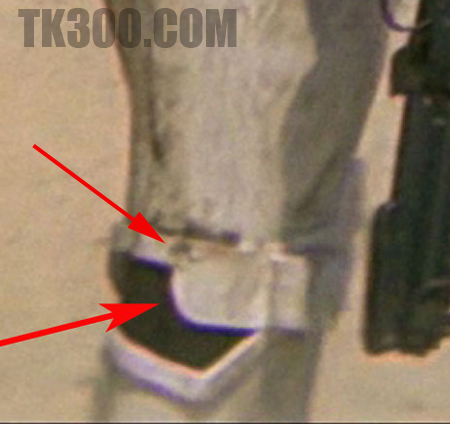
- Notice the above photo showing how the original suits were held together, the front and back were riveted on one side, enabling the actor to step in the calm shell, closing it around them.
- Also notice the Machine screws holding the holster in place.
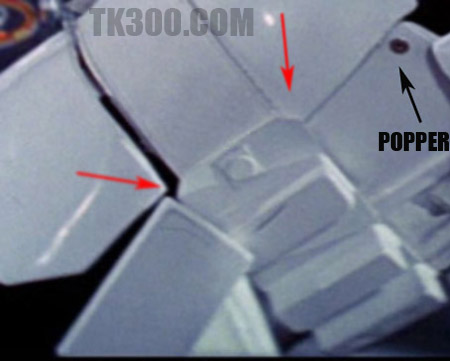
- The square with the circle on the ammo belt was used to cover up the screw (rivet) that held the belt material to the ABS plastic.
- Notice above the popper and some black material showing, this was used as part of the hidden strapping system.
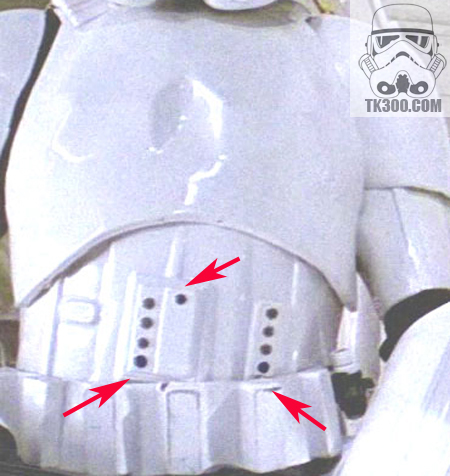
AB section buttons
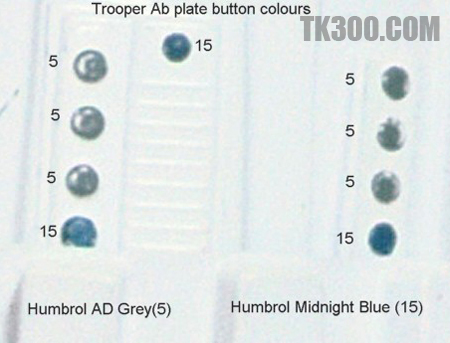
- Notice the different colours, if look at the edge of the blue button, it is darker. This is where the paint hasn't rubbed off. If you paint your AB buttons using Midnight Blue, use thinners as this will get you the above lighter worn colour. * Note you may see the above ref picture elsewhere it's my original photoshop picture when I first did the research, it was posted on the RPB, RPF and UKG sites as well as here, I've watermarked it now, due to plagiarism.
- Some people believe that French blue was used on the ANH troopers, if you look in the ESB Reference section on this site, you will see French blue on a trooper, it has that light blue look, I have not seen this on any ANH troopers.
Butt section trimming. shape
- Photos above give you an idea of how to trim your armour the same.
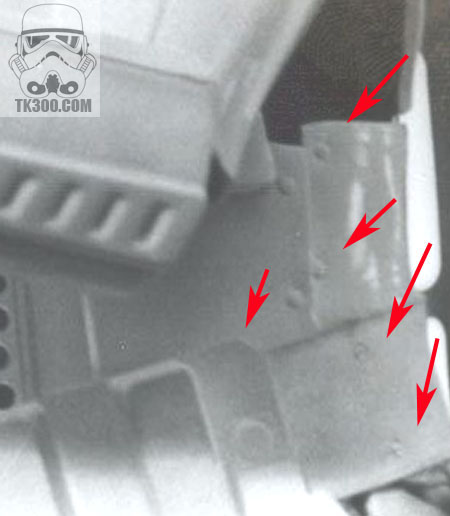
- The Back section is made up of two parts, the higher Kidney section and the lower Butt section.
- Notice the two snaps at the bottom of the butt section, these were used to join the AB(cod) section, stopping the front from flapping forward.
- Also take a look at the Thermal Detonator, see how it was attached to the belt via steel strips (almost like a money clip). The Thermal detonator was made from British grey exterior plumbing pipe, with vac-formed ends and faceplate.
Abdominal and cod section
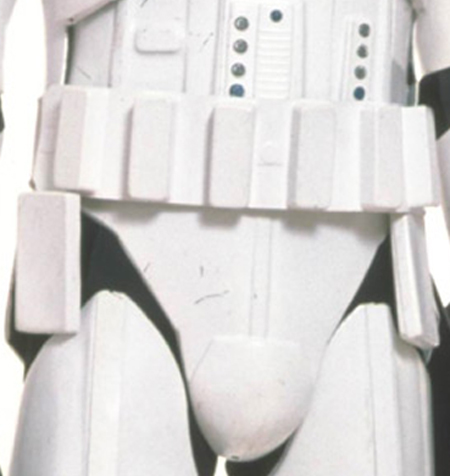
- The Cod section trimming. comprises of three lines each side . Again
notice the drop box has an inside, so is double sided.
Thighs
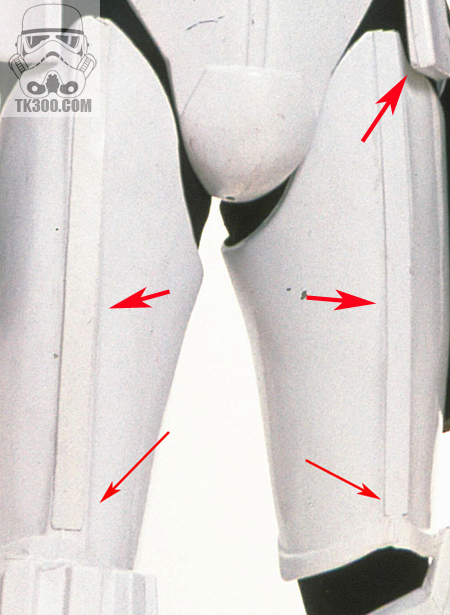
- On the above photo unlike many suits available today, long thin strips of ABS were glued to hide the seams of the clam shell halves. This is repeated on the Calves and biceps armour parts.
- Also check out the drop boxes, notice they have another piece of oblong plastic inside making them a closed oblong shape.
Thigh power pack belt
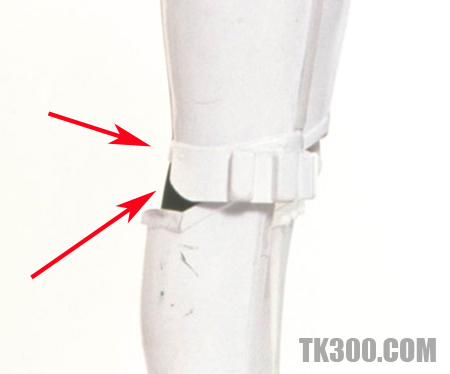
- The Stormtrooper's thigh power pack belt was cut with a curved edge only on the bottom edges of the belt.
- The Sandtrooper's thigh power pack belt was cut with a curved edge on all edges. Photo below.
Boots
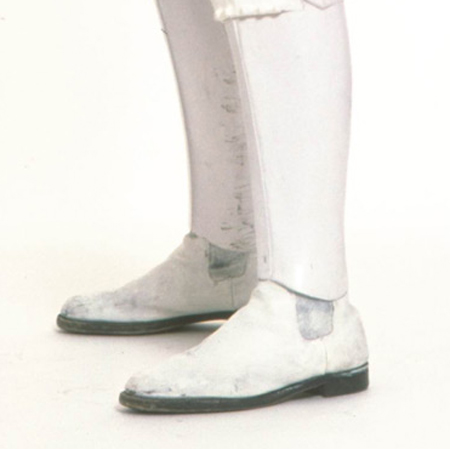
- Black Chelsea (jodhpur boots) were in abundance in the 70's, so these
were painted white leaving the sole black and used as footwear for the
Stormtrooper character.
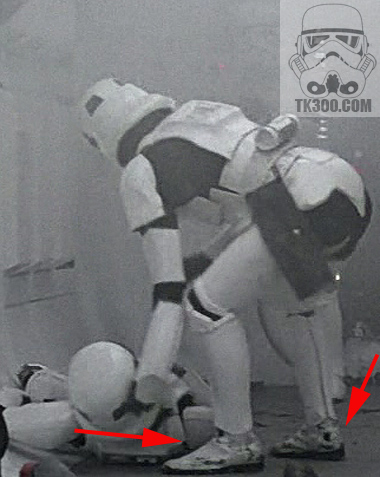
- You can clearly see the white paint has come off the above troopers boots, showing the original black boot.